Getting Started with RockTerm
Step 1: Install RockTerm
Download RockTerm from the Microsoft Store. The free trial includes full functionality so you can evaluate the product before purchasing. Once installed, launch RockTerm from your Start menu or taskbar.
Step 2: Create a Connection
The Session Manager lives on the left side of the window as a lockable dock. Press Ctrl+Shift+N or click New Connection to open the connection dialog, then choose your connection type from the tiles:
SSH
- Host — the hostname or IP address of the remote machine
- Port — the SSH port (default: 22)
- Username — your login username
- Authentication — choose password or SSH key, and provide the key file path if applicable
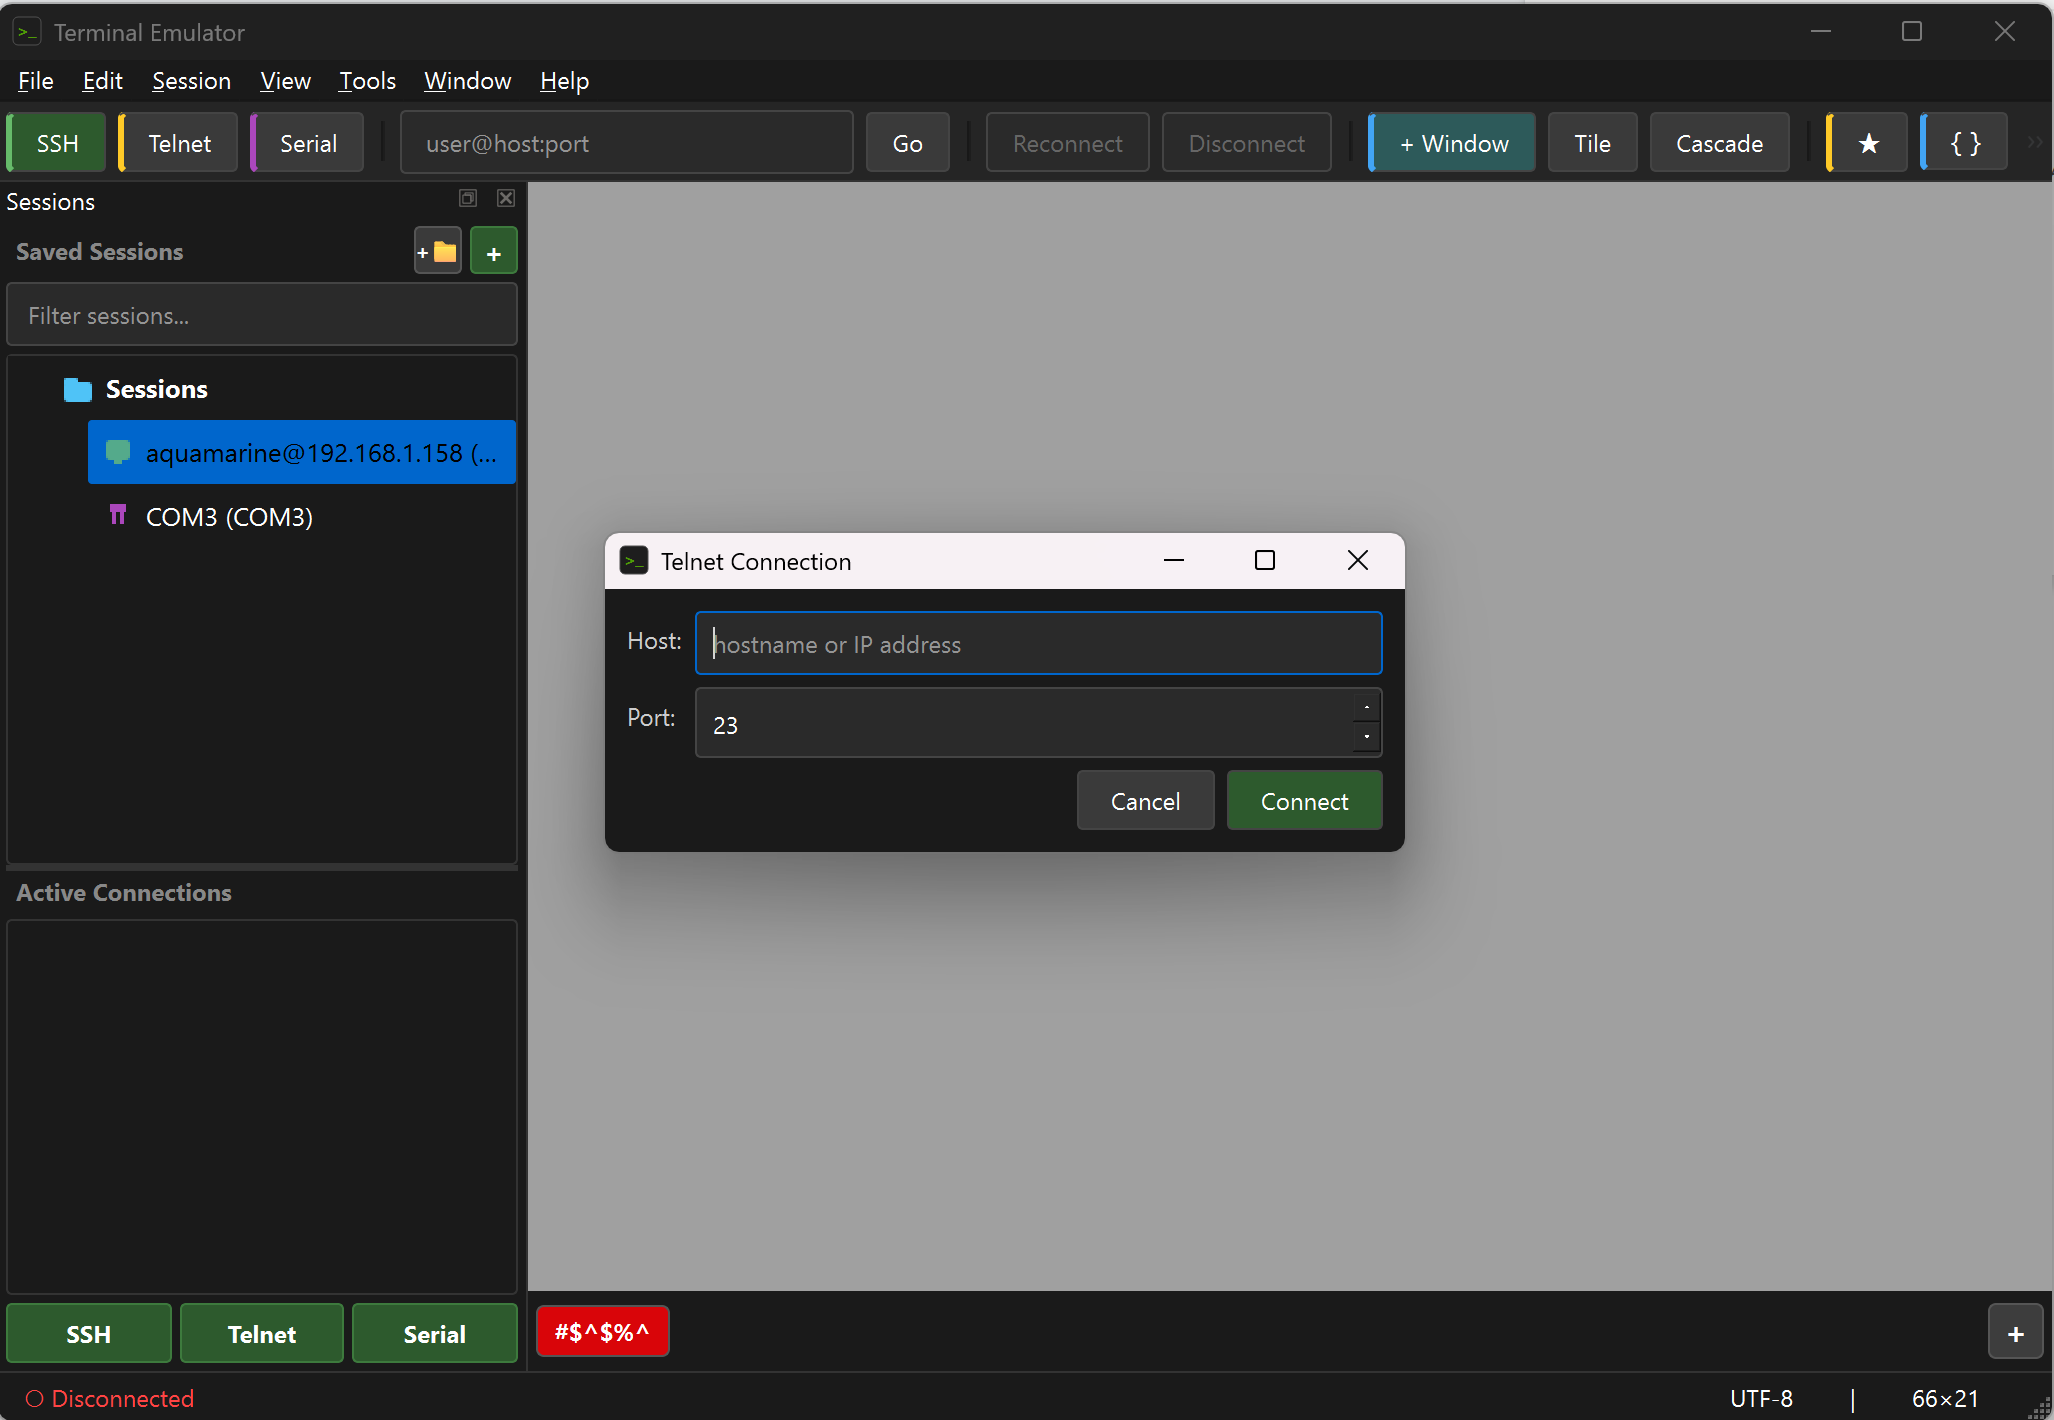
Telnet
- Host — the hostname or IP address of the target device
- Port — the Telnet port (default: 23)
Serial Console
- COM Port — select the serial port (e.g., COM3)
- Baud Rate — the connection speed (common values: 9600, 115200)
- Data Bits / Stop Bits / Parity — configure as required by your device (defaults: 8, 1, None)
If you don't know the correct serial settings, click Auto-Detect in the serial connection dialog. RockTerm will probe the port and determine the correct baud rate, data bits, parity, and flow control automatically. See the Serial Auto-Detect guide for details.
Save the profile. You can organize connections into groups for different environments or projects.
Step 3: Connect
Double-click a saved session in the Session Manager, or click Connect from the New Connection dialog. RockTerm opens the session as a floating sub-window inside the MDI canvas — each tab holds an independent canvas of resizable, tileable terminal windows. You can open multiple connections across tabs and mix SSH, Telnet, serial, and local shells as needed. Tile, cascade, split, or focus-jump between sub-windows with the View menu.
Step 4: Enable the AI Assistant (Optional)
The AI assistant lives in a dockable panel on the right side of the window. Toggle it with Ctrl+Shift+I or View → AI Assistant. Before it can answer questions, configure a provider in Edit → Preferences → AI Assistant:
- Provider — choose Anthropic Claude or OpenAI GPT.
- Model — pick a model the provider offers.
- API key — paste your own key. Requests go directly from your machine to the provider.
Once configured, you can right-click selected terminal output and Send to AI Assistant to ask a question with that context, or use the quick-prompt buttons (Explain, Fix Error, Summarize). Chat history persists across session switches and theme changes, and every context block that gets sent to the model is recorded in the history so you can re-read past conversations.
Step 5: Customize Your Workspace
- Theme —
View → Themetoggles between light and dark UI themes live.Preferences → Appearance → Edit Themesopens a GUI theme editor with 10 built-in palettes (Default, Solarized, Dracula, Gruvbox, Nord, Monokai, Tomorrow Night, Cisco Console, and more). - Highlight rules — colorize terminal output in real time (errors, warnings, interface events, syslog levels). Edit them from
Preferences → Highlighting → Edit Ruleswith live preview. - Button Bar — per-session quick-command buttons for repetitive keystrokes (
show run,reload, etc.). - Script Manager — expect-style automation scripts with a built-in editor and runner.
Ctrl+Shift+SorF5. - Wallpaper — set a background image on the MDI canvas for a personalized look.
Tips
- Organize SSH, Telnet, and serial sessions into folders in the Session Manager for different environments (production, staging, lab).
- Saved credentials are kept in an AES-encrypted Secret Manager vault unlocked with a master password.
- AI features require an active internet connection to the provider you selected. No AI requests are made in the background — only when you explicitly invoke the assistant.